【Android】ViewModel
1.简介
ViewModel是一种状态数据容器,用于将状态公开给UI(如activity或fragment)以及封装相关的业务逻辑。其主要优点是:
- 能够在配置变更(如旋转屏幕)时保持状态数据,使得UI重建后无需重新获取数据。
- 将UI与业务逻辑分离,从而更好地遵循单一职责原则。

- 官方文档:https://developer.android.google.cn/topic/libraries/architecture/viewmodel
- API文档:https://developer.android.google.cn/reference/androidx/lifecycle/ViewModel
- 官方示例:
本文通过一个简单的计数器应用介绍ViewModel的基本用法。
2.实现ViewModel
2.1 添加依赖
ViewModel依赖Jetpack Lifecycle库。在build.gradle文件中添加以下依赖:
1
2
implementation 'androidx.lifecycle:lifecycle-viewmodel:2.9.0'
implementation 'androidx.lifecycle:lifecycle-livedata:2.9.0'
如果使用Kotlin,则添加
1
2
implementation 'androidx.lifecycle:lifecycle-viewmodel-ktx:2.9.0'
implementation 'androidx.lifecycle:lifecycle-livedata-ktx:2.9.0'
注意:为了使用ViewModel,必须将应用迁移到AndroidX(参见Jetpack库)。为此需要
- 添加以下依赖
1
2
implementation 'androidx.appcompat:appcompat:1.7.0'
implementation 'androidx.fragment:fragment:1.7.0'
- 将activity的超类改为
androidx.appcompat.app.AppCompatActivity - 将fragment的超类改为
androidx.fragment.app.Fragment
Android SDK原生的android.app.Activity和android.app.Fragment无法使用ViewModel。
2.2 创建ViewModel类
下面实现计数器ViewModel。在src/main/java目录下创建文件com/example/CounterViewModel.java:
1
2
3
4
5
6
7
8
9
10
11
12
13
14
15
16
17
18
19
20
21
22
23
24
25
26
27
28
29
30
31
32
33
34
35
package com.example;

import androidx.lifecycle.LiveData;
import androidx.lifecycle.MutableLiveData;
import androidx.lifecycle.ViewModel;

public class CounterViewModel extends ViewModel {
    private MutableLiveData<Integer> counter = new MutableLiveData<>();

    public CounterViewModel() {
        counter.setValue(0);
    }

    public LiveData<Integer> getCounter() {
        return counter;
    }

    public void increment() {
        Integer currentValue = counter.getValue();
        if (currentValue != null) {
            counter.setValue(currentValue + 1);
        }
    }

    public void decrement() {
        Integer currentValue = counter.getValue();
        if (currentValue != null && currentValue > 0) {
            counter.setValue(currentValue - 1);
        }
    }

    public void reset() {
        counter.setValue(0);
    }
}
CounterViewModel扩展了ViewModel类,并使用LiveData来保存计数器的值。
LiveData是可感知生命周期的、可观察的数据容器类。使用步骤如下:
- 创建
LiveData的实例以存储某种类型的数据。这通常在ViewModel类中完成。 - 创建
Observer对象并实现onChanged()方法,该方法定义当LiveData对象存储的数据发生变化时要执行的动作(如更新UI)。 - 使用
observe()方法将Observer对象附加到LiveData对象。这通常在UI控制器(如activity或fragment)中完成。当数据发生变化时,观察者会收到通知。
这样就能实现每当应用数据发生变化时自动更新UI。详细信息参见LiveData概览。
LiveData类的getValue()方法返回数据的值。子类MutableLiveData表示可变的LiveData,提供了setValue()和postValue()方法修改数据的值。CounterViewModel利用这些方法实现了增加、减少和重置计数器值的方法。注意,getValue()方法可能返回null,因此必须以null安全的方式使用其返回值。
2.3 在Activity中使用ViewModel
MainActivity与CounterViewModel类位于同一目录中,代码如下:
1
2
3
4
5
6
7
8
9
10
11
12
13
14
15
16
17
18
19
20
21
22
23
24
25
26
27
28
29
30
31
package com.example;

import android.os.Bundle;
import android.widget.Button;
import android.widget.TextView;

import androidx.appcompat.app.AppCompatActivity;
import androidx.lifecycle.ViewModelProvider;

public class MainActivity extends AppCompatActivity {
    private CounterViewModel viewModel;
    private TextView counterText;

    @Override
    protected void onCreate(Bundle savedInstanceState) {
        super.onCreate(savedInstanceState);
        setContentView(R.layout.activity_main);

        counterText = findViewById(R.id.counter_text);
        Button incrementBtn = findViewById(R.id.increment_btn);
        Button decrementBtn = findViewById(R.id.decrement_btn);
        Button resetBtn = findViewById(R.id.reset_btn);

        viewModel = new ViewModelProvider(this).get(CounterViewModel.class);
        viewModel.getCounter().observe(this, count -> counterText.setText(count.toString()));

        incrementBtn.setOnClickListener(v -> viewModel.increment());
        decrementBtn.setOnClickListener(v -> viewModel.decrement());
        resetBtn.setOnClickListener(v -> viewModel.reset());
    }
}
在onCreate()方法中,首先创建ViewModelProvider对象(以activity自身为存储拥有者),然后调用其get()方法获得ViewModel实例。当系统第一次调用activity的onCreate()方法时,会创建一个ViewModel对象。重建的activity会得到与之前相同的ViewModel实例。
接下来为存储计数器值的LiveData附加了观察者,并在其中更新计数器标签的文本。Activity以自身为生命周期拥有者,fragment应使用getViewLifecycleOwner()。
最后, “+” 、 “-“ 和 “Reset” 三个按钮的监听器分别调用了ViewModel中增加、减少和重置计数器值的方法。
布局文件res/layout/activity_main.xml如下所示:
1
2
3
4
5
6
7
8
9
10
11
12
13
14
15
16
17
18
19
20
21
22
23
24
25
26
27
28
29
30
31
32
33
34
35
36
37
38
39
40
41
42
43
44
45
46
47
<?xml version="1.0" encoding="utf-8"?>
<LinearLayout xmlns:android="http://schemas.android.com/apk/res/android"
    xmlns:tools="http://schemas.android.com/tools"
    android:layout_width="match_parent"
    android:layout_height="match_parent"
    android:orientation="vertical"
    android:gravity="center"
    android:padding="16dp"
    tools:context=".MainActivity">

    <TextView
        android:id="@+id/counter_text"
        android:layout_width="wrap_content"
        android:layout_height="wrap_content"
        android:textSize="48sp"
        android:text="0" />

    <LinearLayout
        android:layout_width="match_parent"
        android:layout_height="wrap_content"
        android:orientation="horizontal"
        android:layout_marginTop="16dp"
        android:gravity="center">

        <Button
            android:id="@+id/decrement_btn"
            android:layout_width="wrap_content"
            android:layout_height="wrap_content"
            android:text="-" />

        <Button
            android:id="@+id/reset_btn"
            android:layout_width="wrap_content"
            android:layout_height="wrap_content"
            android:layout_marginStart="16dp"
            android:layout_marginEnd="16dp"
            android:text="Reset" />

        <Button
            android:id="@+id/increment_btn"
            android:layout_width="wrap_content"
            android:layout_height="wrap_content"
            android:text="+" />

    </LinearLayout>

</LinearLayout>
计数器应用的屏幕截图如下。可以看到,点击 “+” 按钮时,ViewModel数据的观察者会自动更新计数器标签的文本。当用户旋转设备时,activity会被销毁并重建,但ViewModel会保留计数器的值。
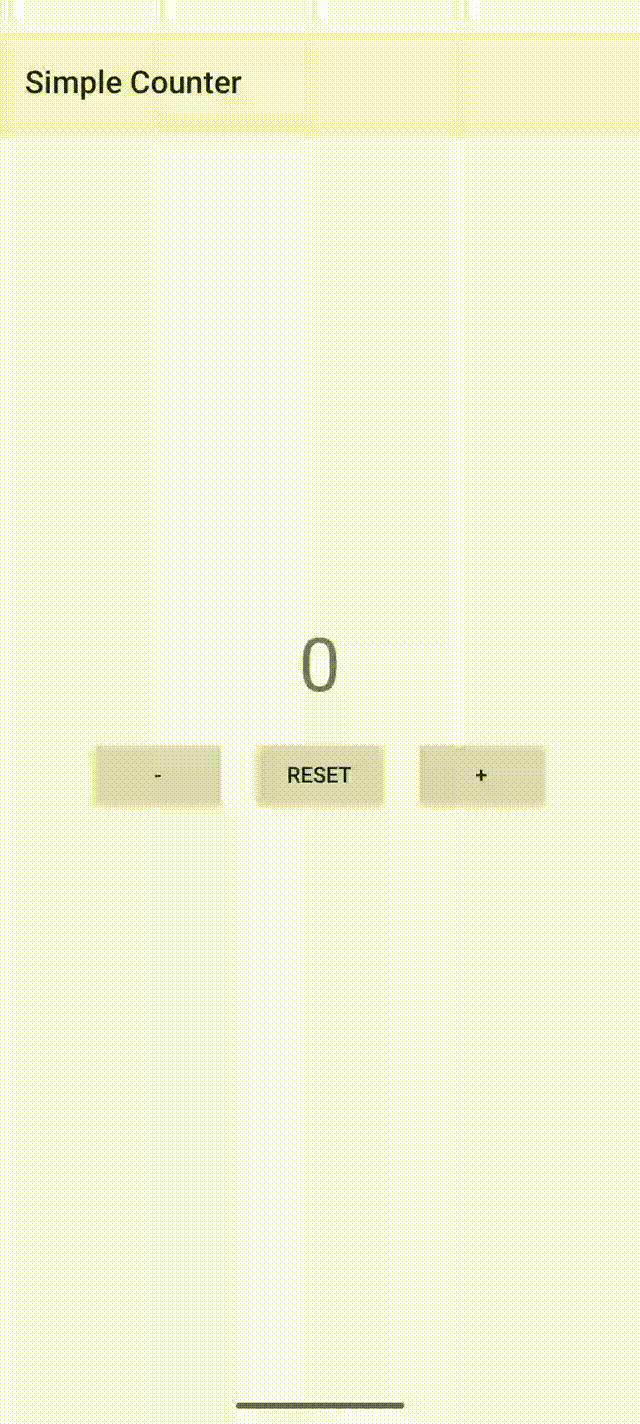
如果不使用ViewModel,那么必须在三个按钮的监听器中手动更新标签文本,并且activity需要实现onSaveInstanceState()和onRestoreInstanceState()方法来保存和恢复状态数据(否则当activity重建时数据会丢失)。
2.4 传递初始参数
默认情况下,ViewModelProvider只会调用ViewModel的默认构造器。如果ViewModel不依赖外部数据,则可以在默认构造器中完成初始化(如上面的示例所示):
1
2
3
public CounterViewModel() {
    counter.setValue(0);
}
如果需要向ViewModel传递初始参数(例如计数器的初始值),有两种方式。
第一种方式是在ViewModel中添加初始化方法,例如:
1
2
3
4
5
6
7
public class CounterViewModel extends ViewModel {
    // ...

    public void init(int initialValue) {
        counter.setValue(initialValue);
    }
}
注意,该方法只能在activity或fragment初次创建时调用(例如在activity的onCreate()方法中判断savedInstanceState == null)。否则,当activity重建时会重复初始化ViewModel,导致保存的数据被覆盖。
1
2
3
4
5
6
7
8
9
10
11
public class MainActivity extends AppCompatActivity {
    // ...

    @Override
    protected void onCreate(Bundle savedInstanceState) {
        // ...
        viewModel = new ViewModelProvider(this).get(CounterViewModel.class);
        if (savedInstanceState == null)
            viewModel.init(42);
    }
}
第二种方式是使用ViewModel工厂。首先,在ViewModel中添加接受初始参数的构造器:
1
2
3
4
5
6
7
public class CounterViewModel extends ViewModel {
    // ...

    public CounterViewModel(int initialValue) {
        counter.setValue(initialValue);
    }
}
然后创建一个实现了ViewModelProvider.Factory接口的类,通过构造器传递初始参数,并在create()方法中使用这些参数创建ViewModel对象:
1
2
3
4
5
6
7
8
9
10
11
12
13
14
public class CounterViewModelFactory implements ViewModelProvider.Factory {
    private int initialValue;

    public CounterViewModelFactory(int initialValue) {
        this.initialValue = initialValue;
    }

    @Override
    public @NotNull <T extends ViewModel> T create(@NotNull Class<T> modelClass) {
        if (modelClass.isAssignableFrom(CounterViewModel.class))
            return (T) new CounterViewModel(initialValue);
        throw new IllegalArgumentException("This factory can't create " + modelClass);
    }
}
最后,在创建ViewModel时,将工厂作为ViewModelProvider的第二个参数:
1
2
viewModel = new ViewModelProvider(this, new CounterViewModelFactory(42))
        .get(CounterViewModel.class);
3.ViewModel的生命周期
ViewModel的生命周期与其作用域直接关联,作用域是创建ViewModelProvider时指定的ViewModelStoreOwner对象(如activity或fragment)。ViewModel会一直留在内存中,直到其作用域消失(如activity结束,或fragment分离)。
下图说明了activity经历屏幕旋转然后结束时的生命周期状态。这些基本状态同样适用于fragment的生命周期。

从activity首次创建到结束并销毁,ViewModel一直存在。
4.最佳实践
以下是实现ViewModel时应该遵循的一些最佳实践:
- ViewModel不应该知道UI实现细节。
- ViewModel不应该持有任何生命周期相关API(如
Context)的引用,以免发生内存泄漏。 - 不要将ViewModel传递给其他类、函数或UI组件,以防止较低级别的组件访问超出其需求的数据和逻辑。
5.测试ViewModel
由于ViewModel不依赖Android API,因此可以很容易地对其编写单元测试。
首先在build.gradle文件中添加测试依赖:
1
2
3
testImplementation 'junit:junit:4.13.2'
testImplementation 'org.mockito:mockito-core:4.11.0'
testImplementation 'androidx.arch.core:core-testing:2.2.0'
在src/test/java目录下创建文件com/example/CounterViewModelTest.java:
1
2
3
4
5
6
7
8
9
10
11
12
13
14
15
16
17
18
19
20
21
22
23
24
25
26
27
28
29
30
31
32
33
34
35
36
37
38
39
40
41
42
43
44
45
46
47
48
49
50
51
52
53
54
55
56
57
58
59
60
61
62
63
64
65
66
67
68
69
70
71
package com.example;

import org.junit.Before;
import org.junit.Rule;
import org.junit.Test;

import androidx.arch.core.executor.testing.InstantTaskExecutorRule;
import androidx.lifecycle.Observer;

import static org.junit.Assert.*;
import static org.mockito.Mockito.*;

public class CounterViewModelTest {
    // 这条规则使得LiveData的setValue能立即执行
    @Rule
    public InstantTaskExecutorRule instantTaskExecutorRule = new InstantTaskExecutorRule();

    private CounterViewModel viewModel;

    @Before
    public void setUp() {
        viewModel = new CounterViewModel();
    }

    @Test
    public void testInitialValue() {
        Integer value = viewModel.getCounter().getValue();
        assertNotNull(value);
        assertEquals(0, value.intValue());
    }

    @Test
    public void testIncrement() {
        viewModel.increment();
        viewModel.increment();
        viewModel.increment();
        assertEquals(3, viewModel.getCounter().getValue().intValue());
    }

    @Test
    public void testDecrement() {
        viewModel.increment();
        viewModel.increment();
        viewModel.decrement();
        assertEquals(1, viewModel.getCounter().getValue().intValue());

        viewModel.decrement();
        viewModel.decrement();  // 不会变为负数
        assertEquals(0, viewModel.getCounter().getValue().intValue());
    }

    @Test
    public void testReset() {
        viewModel.increment();
        viewModel.increment();
        viewModel.reset();
        assertEquals(0, viewModel.getCounter().getValue().intValue());
    }

    @Test
    public void testObserve() {
        Observer<Integer> observer = mock(Observer.class);
        viewModel.getCounter().observeForever(observer);

        viewModel.increment();
        viewModel.decrement();

        verify(observer, times(2)).onChanged(0);  // 包括初始值
        verify(observer).onChanged(1);
    }
}
要运行单元测试,可以使用Android Studio点击测试类旁边的运行按钮。或者在命令行中使用Gradle Wrapper:
1
./gradlew :app:testDebugUnitTest --tests com.example.CounterViewModelTest