PyQt基础教程
1.简介
Qt是一个功能强大的跨平台C++图形用户界面(GUI)框架,广泛用于开发桌面、移动和嵌入式系统的应用程序,支持多种操作系统,并提供了丰富的工具和模块来简化开发过程。
- 官方网站:https://www.qt.io/
- 官方文档:https://doc.qt.io/
- 下载地址:https://www.qt.io/development/download-qt-installer-oss
Qt的Python工具包对Qt库进行了封装,可以使用Python开发Qt应用程序。主要有两个Python工具包:PySide和PyQt。
PySide
PySide是Qt官方的Qt for Python项目,提供了Qt库的Python API。
- 官方文档:https://doc.qt.io/qtforpython-6/
- 官方教程:https://doc.qt.io/qtforpython-6/tutorials/index.html
- 示例:https://doc.qt.io/qtforpython-6/examples/index.html
安装:
1
pip install PySide6
PySide6对应Qt6,PySide2对应Qt5,PySide对应Qt4。
验证安装成功:
1
2
3
4
5
6
7
import PySide6.QtCore

# Prints PySide6 version
print(PySide6.__version__)

# Prints the Qt version used to compile PySide6
print(PySide6.QtCore.__version__)
PyQt
PyQt是Riverbank Computing公司开发的Qt Python工具包,比PySide出现得早,API与PySide基本相同。二者的区别详见Differences Between PySide and PyQt。
- 官方网站:https://www.riverbankcomputing.com/software/pyqt/
- 官方文档:https://www.riverbankcomputing.com/static/Docs/PyQt6/
安装:
1
pip install PyQt6
PyQt6对应Qt6,PyQt5对应Qt5,PyQt4对应Qt4。
2.入门
https://doc.qt.io/qtforpython-6/gettingstarted.html
Qt提供了两种构建UI的方式:
- Qt Widgets:命令式编程和设计方式,自Qt诞生以来就存在,稳定可靠。
- Qt Quick:声明式编程和设计方式,能够通过用简单元素描述来创建流畅的UI。
2.1 使用Qt Widgets创建第一个Qt应用
下面开发一个用多种语言打印 “Hello World” 的简单应用程序。
(1)创建一个名为hello_world.py的文件,并添加以下导入:
1
2
3
4
import random
import sys

from PySide6 import QtWidgets, QtCore
PySide6模块的子模块提供了对Qt API的访问。在这里导入了子模块QtCore和QtWidgets。
注:如果选择PyQt6,需要将模块名从PySide6改为PyQt6。
(2)定义一个名为MyWidget的类,该类扩展QWidget,包含一个按钮和一个标签:
1
2
3
4
5
6
7
8
9
10
11
12
13
14
15
16
17
18
19
class MyWidget(QtWidgets.QWidget):

    def __init__(self):
        super().__init__()

        self.hello = ["Hello World", "Hallo Welt", "Hei maailma", "Hola Mundo", "Привет мир", "你好世界"]

        self.button = QtWidgets.QPushButton("Click me!")
        self.text = QtWidgets.QLabel("Hello World", alignment=QtCore.Qt.AlignCenter)

        self.layout = QtWidgets.QVBoxLayout(self)
        self.layout.addWidget(self.text)
        self.layout.addWidget(self.button)

        self.button.clicked.connect(self.magic)

    @QtCore.Slot()
    def magic(self):
        self.text.setText(random.choice(self.hello))
当点击按钮时,会调用magic()函数,从hello列表中随机选择一项并更新标签文本。
(3)添加main函数,实例化MyWidget并显示:
1
2
3
4
5
6
7
8
if __name__ == '__main__':
    app = QtWidgets.QApplication([])

    widget = MyWidget()
    widget.resize(300, 200)
    widget.show()

    sys.exit(app.exec())
完整代码:hello_world.py
使用以下命令运行该示例:
1
python hello_world.py
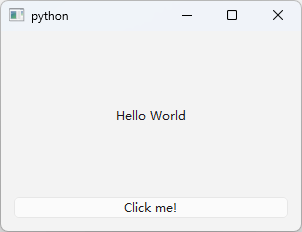
点击底部按钮,会看到不同语言的问候语。
2.2 使用Qt Quick创建第一个Qt应用
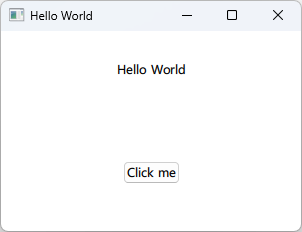
下面使用Qt Quick实现同样的功能。
UI可以用QML语言描述:
1
2
3
4
5
6
7
8
9
10
11
12
13
14
15
16
17
18
19
20
21
22
23
24
25
26
27
28
29
30
31
32
33
34
import QtQuick
import QtQuick.Controls
import QtQuick.Layouts

Window {
    width: 300
    height: 200
    visible: true
    title: "Hello World"

    readonly property list<string> texts: [
        "Hello World", "Hallo Welt", "Hei maailma", "Hola Mundo", "Привет мир", "你好世界"
    ]

    function setText() {
        var i = Math.round(Math.random() * 5)
        text.text = texts[i]
    }

    ColumnLayout {
        anchors.fill:  parent

        Text {
            id: text
            text: "Hello World"
            Layout.alignment: Qt.AlignHCenter
        }
        Button {
            text: "Click me"
            Layout.alignment: Qt.AlignHCenter
            onClicked: setText()
        }
    }
}
将以上代码放在名为Example的目录中的Main.qml文件中,另外用一个名为qmldir的文件描述QML模块:
1
2
module Example
Main 254.0 Main.qml
注:QML完整语法参见文档QML Reference。
最后创建一个hello_world_quick.py文件(与Example目录并列),在main函数中实例化QQmlApplicationEngine并加载QML:
1
2
3
4
5
6
7
8
9
10
11
12
13
14
15
import sys

from PySide6.QtGui import QGuiApplication
from PySide6.QtQml import QQmlApplicationEngine

if __name__ == "__main__":
    app = QGuiApplication(sys.argv)
    engine = QQmlApplicationEngine()
    engine.addImportPath(sys.path[0])
    engine.loadFromModule("Example", "Main")
    if not engine.rootObjects():
        sys.exit(-1)
    exit_code = app.exec()
    del engine
    sys.exit(exit_code)
完整代码:
使用以下命令运行该示例:
1
python hello_world_quick.py
3.Qt Widgets基础教程
https://doc.qt.io/qtforpython-6/tutorials/index.html
Qt内置构件的完整列表参见文档Qt Widgets和Widgets Classes。
3.1 构件
https://doc.qt.io/qtforpython-6/tutorials/basictutorial/widgets.html
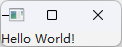
下面是PySide6的简单Hello World示例:
1
2
3
4
5
6
7
8
import sys

from PySide6.QtWidgets import QApplication, QLabel

app = QApplication(sys.argv)
label = QLabel("Hello World!")
label.show()
app.exec()
- 从
PySide6.QtWidgets模块导入需要的类。 - 创建
QApplication实例,可以传递命令行参数。 QLabel是一个可以展示文本(纯文本或HTML)和图像的构件(widget),创建后调用其show()方法。- 最后调用
app.exec()进入Qt主循环。
3.2 按钮
https://doc.qt.io/qtforpython-6/tutorials/basictutorial/clickablebutton.html
本教程介绍如何处理信号和槽。信号(signal)和槽(slot)是一项Qt的特性,允许图形构件与其他构件或Python代码进行通信。本示例将创建一个按钮,每次点击时都会向控制台发送消息 “Button clicked, Hello!” 。
首先导入必要的模块和类:
1
2
3
import sys
from PySide6.QtCore import Slot
from PySide6.QtWidgets import QApplication, QPushButton
创建一个向控制台打印消息的函数:
1
2
3
@Slot()
def say_hello():
    print("Button clicked, Hello!")
@Slot()是一个装饰器,用于将函数标识为槽。
创建QApplication:
1
2
# Create the Qt Application
app = QApplication(sys.argv)
接下来创建一个按钮,这是一个QPushButton实例,传递一个字符串给构造函数作为按钮标签:
1
2
# Create a button
button = QPushButton("Click me")
之后需要将按钮连接到say_hello()函数。QPushButton有一个预定义的信号clicked,在按钮被点击时触发。将该信号连接到say_hello()函数:
1
2
# Connect the button to the function
button.clicked.connect(say_hello)
最后显示按钮并启动Qt主循环:
1
2
3
4
# Show the button
button.show()
# Run the main Qt loop
app.exec()
完整代码:button.py
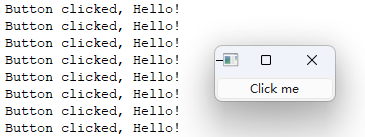
信号和槽的详细介绍参见文档Signals and Slots。
3.3 对话框
https://doc.qt.io/qtforpython-6/tutorials/basictutorial/dialog.html
本教程介绍如何创建一个包含基本构件的简单对话框,让用户在输入框中输入姓名,点击按钮后显示问候语。
首先创建并显示一个简单的对话框:
1
2
3
4
5
6
7
8
9
10
11
12
13
14
15
16
17
18
19
20
import sys

from PySide6.QtWidgets import QDialog, QApplication


class Form(QDialog):

    def __init__(self, parent=None):
        super().__init__(parent)
        self.setWindowTitle("My Form")


if __name__ == "__main__":
    # Create the Qt Application
    app = QApplication(sys.argv)
    # Create and show the form
    form = Form()
    form.show()
    # Run the main Qt loop
    sys.exit(app.exec())
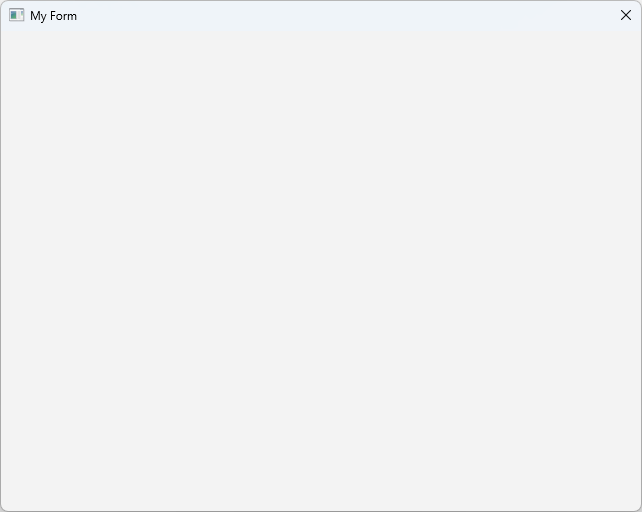
可以创建任何构件的子类。在这个示例中,通过继承QDialog创建了一个自定义对话框,称为Form。在main函数中创建了一个Form对象,显示一个空白对话框。
创建构件
下面创建两个构件:一个QLineEdit,用户在这里输入姓名;一个QPushButton,点击时打印问候语。将以下代码添加到Form的__init__()方法:
1
2
3
# Create widgets
self.edit = QLineEdit("Write my name here..")
self.button = QPushButton("Show Greetings")
创建布局
Qt支持布局(layout),可以帮助组织应用程序中的构件。在这里使用QVBoxLayout来垂直排列构件。将以下代码添加到__init__()方法创建构件的代码之后:
1
2
3
4
# Create layout and add widgets
layout = QVBoxLayout(self)
layout.addWidget(self.edit)
layout.addWidget(self.button)
创建函数并连接到按钮
向Form类添加一个方法:
1
2
3
# Greets the user
def greetings(self):
    print(f"Hello {self.edit.text()}")
使用QLineEdit.text()方法获取文本。
最后将按钮连接到Form.greetings()方法,向__init__()方法添加以下代码:
1
2
# Add button signal to greetings slot
self.button.clicked.connect(self.greetings)
完整代码:dialog.py
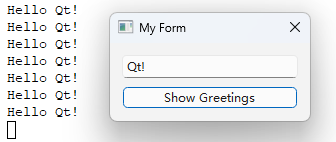
执行代码,输入名字并点击按钮,会在控制台显示问候语。
3.4 表格
https://doc.qt.io/qtforpython-6/tutorials/basictutorial/tablewidget.html
如果要显示表格数据,可以使用QTableWidget。还可以创建数据模型并使用QTableView显示。
注:关于Qt中的Model/View架构详见文档Model/View Programming。
1.导入类:
1
2
3
import sys
from PySide6.QtGui import QColor
from PySide6.QtWidgets import QApplication, QTableWidget, QTableWidgetItem
2.创建一个简单的数据模型,包含不同颜色的名字和十六进制代码列表:
1
2
3
4
5
6
7
8
9
10
colors = [
    ("Red", "#FF0000"),
    ("Green", "#00FF00"),
    ("Blue", "#0000FF"),
    ("Black", "#000000"),
    ("White", "#FFFFFF"),
    ("Electric Green", "#41CD52"),
    ("Dark Blue", "#222840"),
    ("Yellow", "#F9E56d")
]
3.定义一个将十六进制代码转换为RGB的函数:
1
2
3
4
def get_rgb_from_hex(code):
    code_hex = code.replace("#", "")
    rgb = tuple(int(code_hex[i:i + 2], 16) for i in (0, 2, 4))
    return QColor.fromRgb(rgb[0], rgb[1], rgb[2])
4.实例化QApplication:
1
app = QApplication()
5.创建QTableWidget,设置行数等于颜色的个数,列数等于每个颜色的成员数+1(用于显示颜色),使用setHorizontalHeaderLabels()设置列名:
1
2
3
4
table = QTableWidget()
table.setRowCount(len(colors))
table.setColumnCount(len(colors[0]) + 1)
table.setHorizontalHeaderLabels(["Name", "Hex Code", "Color"])
6.遍历colors,对于每个单元格创建一个QTableWidgetItems实例,使用(x, y)坐标将其添加到表格:
1
2
3
4
5
6
7
8
for i, (name, code) in enumerate(colors):
    item_name = QTableWidgetItem(name)
    item_code = QTableWidgetItem(code)
    item_color = QTableWidgetItem()
    item_color.setBackground(get_rgb_from_hex(code))
    table.setItem(i, 0, item_name)
    table.setItem(i, 1, item_code)
    table.setItem(i, 2, item_color)
7.显示表格并执行QApplication:
1
2
table.show()
sys.exit(app.exec())
完整代码:table.py
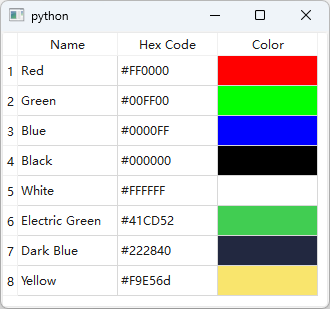
最终程序如下图所示:
3.5 树
https://doc.qt.io/qtforpython-6/tutorials/basictutorial/treewidget.html
如果要显示树形数据,可以使用QTreeWidget。还可以创建数据模型并使用QTreeView显示。
1.导入类:
1
2
import sys
from PySide6.QtWidgets import QApplication, QTreeWidget, QTreeWidgetItem
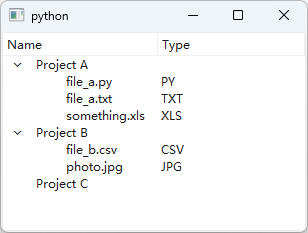
2.定义一个包含项目结构的字典,以树形结构显示信息,其中包含每个项目的文件:
1
2
3
4
5
data = {
    "Project A": ["file_a.py", "file_a.txt", "something.xls"],
    "Project B": ["file_b.csv", "photo.jpg"],
    "Project C": []
}
3.实例化QApplication:
1
app = QApplication()
4.创建QTreeWidget,包含两列,一列是项目/文件名称,另一列是文件类型。使用setHeaderLabels()设置列名:
1
2
3
tree = QTreeWidget()
tree.setColumnCount(2)
tree.setHeaderLabels(["Name", "Type"])
5.遍历data,对于每个节点创建一个QTreeWidgetItem实例,并添加到对应的父节点。只对文件提取扩展名,并将其添加到第二列。
1
2
3
4
5
6
7
8
9
10
items = []
for key, values in data.items():
    item = QTreeWidgetItem([key])
    for value in values:
        ext = value.split(".")[-1].upper()
        child = QTreeWidgetItem([value, ext])
        item.addChild(child)
    items.append(item)

tree.insertTopLevelItems(0, items)
6.显示树并执行QApplication:
1
2
tree.show()
sys.exit(app.exec())
完整代码:tree.py
最终程序如下图所示: